Virtual Envs 🏠🔒📦
One project, one private room! Keep packages isolated so projects never conflict with each other.
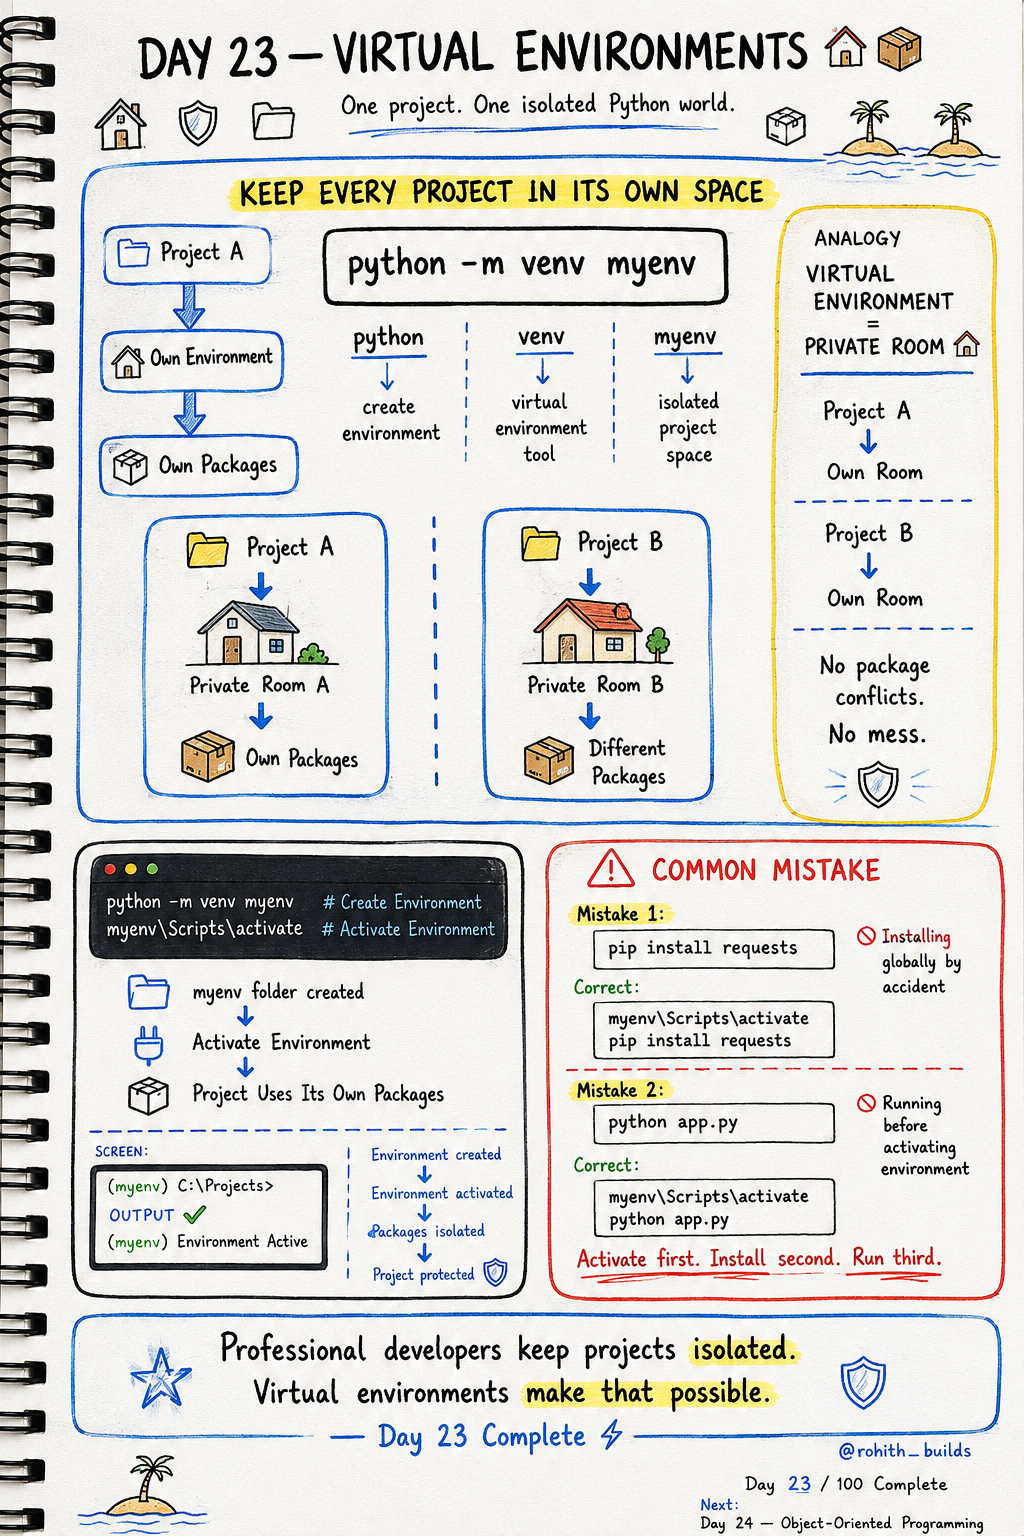
Day 23: Virtual Environments — One Project, One Private Room!
What's the Problem?
Imagine two friends sharing one bedroom. One needs silence to study, the other plays loud music. Chaos! Same thing happens when two Python projects share the same packages. Project A needs Flask version 1, Project B needs Flask version 2 — they crash into each other. Virtual environments give each project its own private room. No conflicts. No mess!
Creating a Virtual Environment
python -m venv myenv
Run this in your terminal. python -m venv creates the environment. myenv is just the name — you can call it anything. This creates a private folder with its own Python and packages inside!
Activating It
myenv\Scripts\activate
On Windows use this. On Mac/Linux use: source myenv/bin/activate. Once activated you'll see (myenv) appear in your terminal. That means you're now inside the private room. Any packages you install now stay here only!
The Full Workflow
python -m venv myenv          # Step 1 — create room
myenv\Scripts\activate        # Step 2 — enter room
pip install requests          # Step 3 — install packages
python app.py                 # Step 4 — run your project
Always follow this order — create, activate, install, run. Skipping activation means packages install globally and cause conflicts with other projects!
Real World Connection
Every professional developer uses virtual environments. When you join a company and work on their Python project, the first thing they tell you is "create a virtual environment." Netflix, Instagram, every tech company — all their Python projects run in isolated environments. This is standard professional practice!
Common Mistakes
Mistake 1 — Installing packages without activating first.
pip install requests           # WRONG — installs globally!

myenv\Scripts\activate
pip install requests           # CORRECT — installs in room only!
Mistake 2 — Running your project before activating.
python app.py                  # WRONG — packages not found!

myenv\Scripts\activate
python app.py                  # CORRECT
Mini Challenge
Mini Challenge
Create a virtual environment called "myproject". Activate it — see (myproject) appear in your terminal. Install requests inside it. Then create a simple Python file and run it. You're now working exactly like a professional developer at a real tech company!
Quick Quiz
Q: What's the correct order — create, install, or activate first? A: Create → Activate → Install → Run. Always!
Q: How do you know a virtual environment is active? A: You see (myenv) at the start of your terminal line!
Q: Why not just install all packages globally? A: Different projects need different package versions — they'll conflict and break each other!
Key Takeaways
Key Takeaways
- Virtual environments give each project its own isolated space.
- Create with python -m venv myenv. Activate before doing anything else.
- Always activate first, install second, run third.
- (myenv) in your terminal means the environment is active.
- Every professional Python developer uses virtual environments — now you do too!
Continue Learning with Rohi
You've used your 3 free Rohi questions. Create a free account to continue learning.