Agent Product 📦🤖🚀
Deploy your AI Research Agent to Render, add your API key securely, and get a public URL anyone in the world can access.
Day 7 — Turn Your Agent Into a Product
AI Agent Course — RohithBuilds
Step 1 — Create a Render Account
Today we will deploy our AI Research Agent to the internet using Render.
Render is a cloud platform that can host Python applications and give us a public URL anyone can access.
- Open your browser
- Go to render.com
- Click Sign Up
- Choose Continue with GitHub
- Authorize Render to access your GitHub account
After signing in, you should see your Render dashboard.
Why Are We Using Render?
- Free hosting tier
- Easy GitHub integration
- Automatic deployments
- Perfect for beginner AI projects
Step 2 — Verify Your GitHub Repository
Before deploying, make sure your project is uploaded to GitHub.
Open your GitHub repository and verify that these files are present:
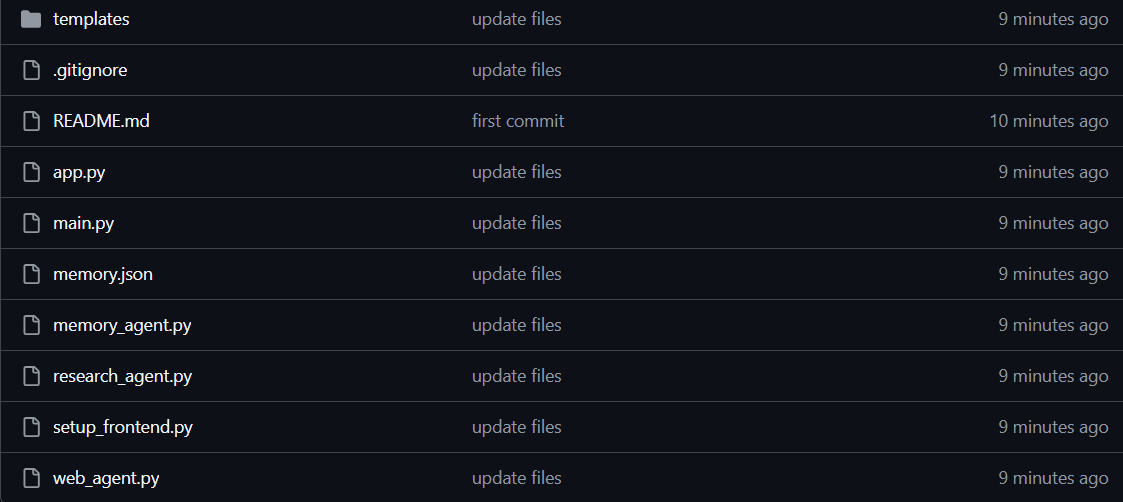
If you recently made changes, push them first:
git add .
git commit -m "Ready for deployment"
git push
Once GitHub shows your latest files, you are ready to connect the repository to Render.
Step 3 — Connect GitHub to Render
Now we will connect Render to the GitHub repository that contains our AI Research Agent.
- In the Render dashboard, click New
- Select Web Service
- Click Connect GitHub
- If prompted, authorize Render to access your repositories
- Find your repository:
ai-agent-course - Click Connect
Render will now read your code directly from GitHub. Any future changes you push to GitHub can be deployed automatically.
Step 4 — Configure Your Web Service
After connecting your repository, Render will ask for deployment settings.
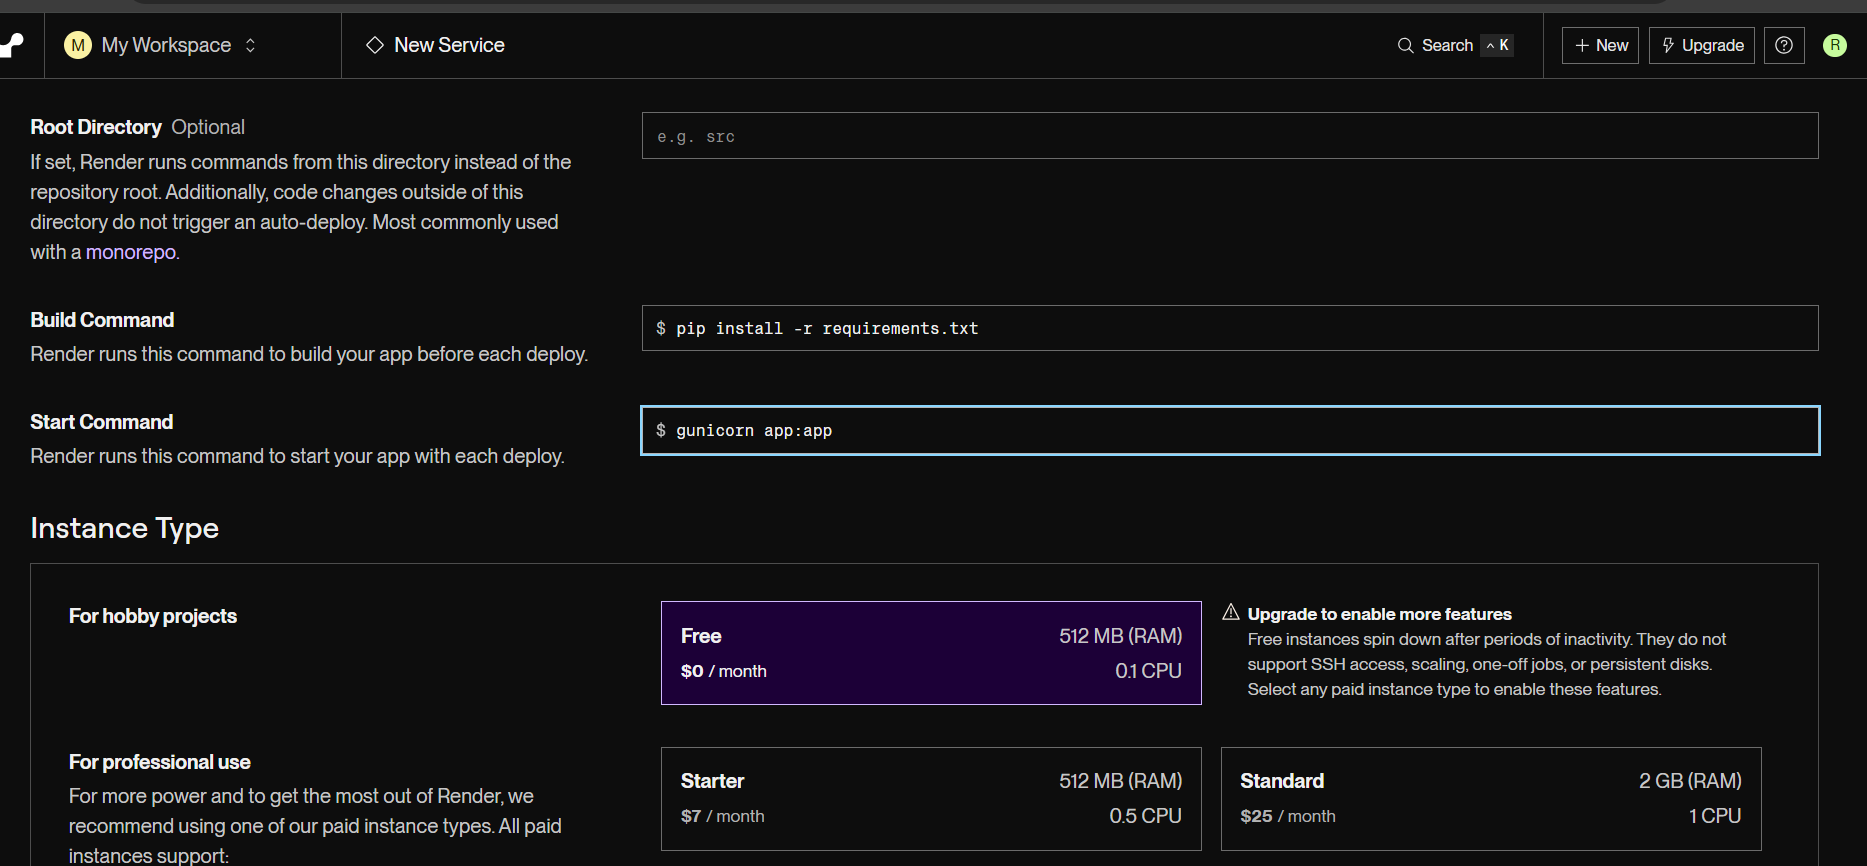
Fill in the following values:
- Name:
rohi-research-agent - Runtime: Python 3
- Build Command:
pip install -r requirements.txt - Start Command:
gunicorn app:app
These settings tell Render how to install your project dependencies, which file contains your Flask application, and how to start your web server. Double-check everything before continuing.
Step 5 — Add Your Environment Variables
Your AI application needs access to your Groq API key. For security reasons, API keys should never be stored directly in your code or uploaded to GitHub.
In Render:
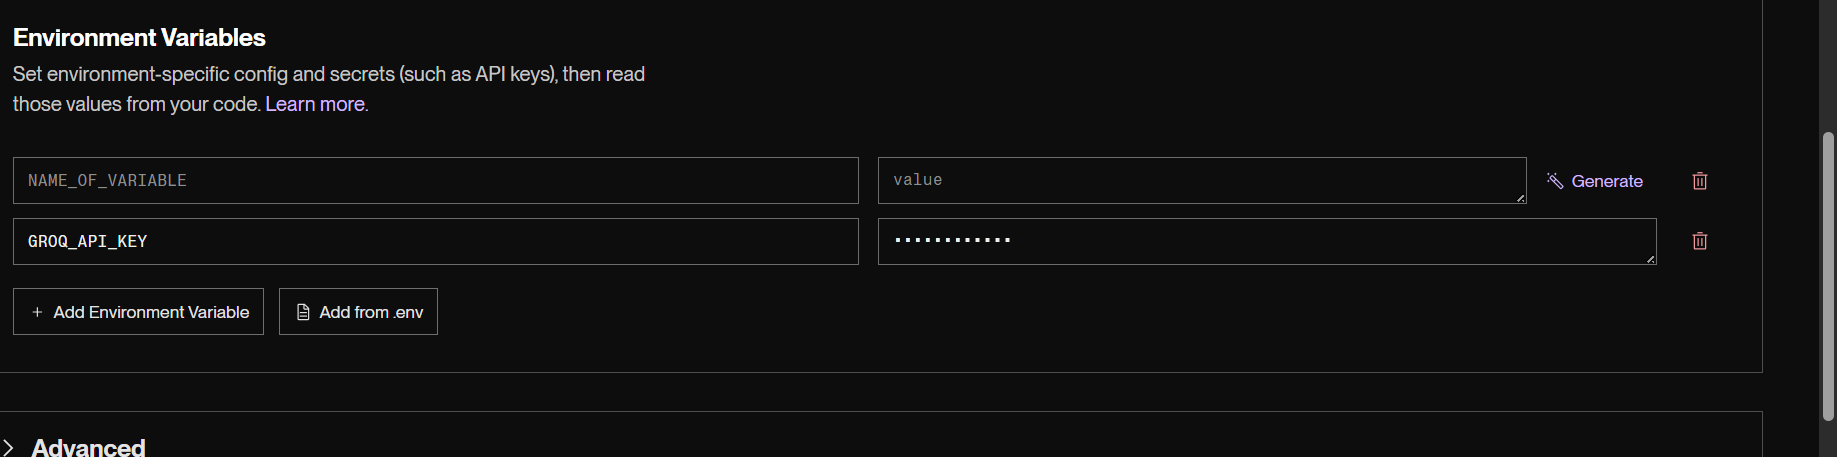
- Scroll down to Environment Variables
- Click Add Environment Variable
- Key:
GROQ_API_KEY— Value: your actual Groq API key - Click Save Changes
Render will securely store the key and make it available to your application when it runs.
⚠️ Why This Matters
Without this environment variable, your app will throw a Groq Authentication Error and your AI agent will not be able to generate reports.
Step 6 — Deploy Your Application
Everything is now configured. Click Create Web Service.
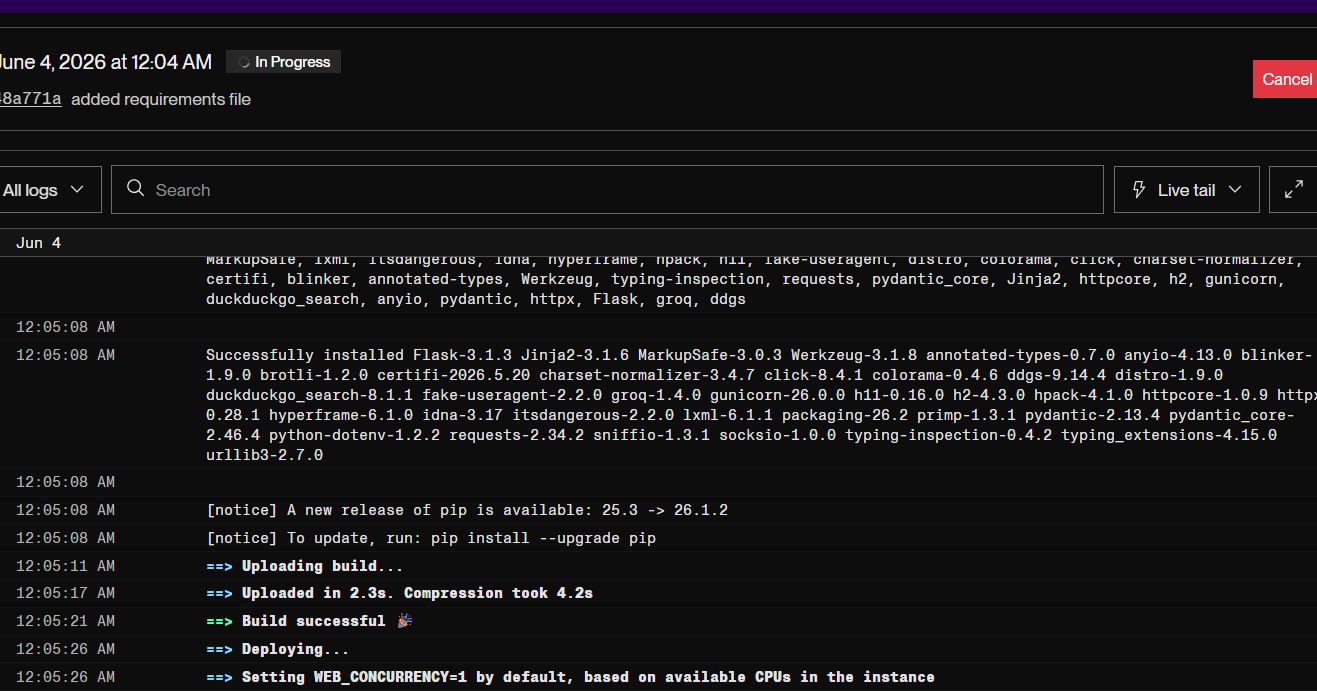
Render will now:
- Clone your GitHub repository
- Install all libraries from
requirements.txt - Start your Flask application
- Generate a public URL
Deployment usually takes 2–5 minutes. You can watch the deployment logs in real time.
When deployment is successful, you will see a message similar to:
Your service is live 🎉And a public URL like:
https://ai-agent-skng.onrender.com🎉 Congratulations
Seven days ago, you started with an empty folder.
Today, you have:
- Built AI applications with Groq
- Added memory to an AI agent
- Connected tools like web search and file reading
- Created a Research Agent
- Built a Flask web application
- Pushed code to GitHub
- Deployed your project to the internet
Most people consume AI. You built with it.
This is only the beginning. Keep building. Keep experimenting. Keep shipping projects. Every real AI engineer started exactly where you are now.
🚀 What's Next?
The best way to improve is to build. Some project ideas:
- AI Resume Reviewer
- AI Study Assistant
- AI Content Generator
- AI Customer Support Agent
- AI Research Assistant
Pick one. Build it. Deploy it. Share it. Then build the next one.
Key Takeaways
- Render account created ✅
- GitHub repository verified ✅
- Render connected to GitHub ✅
- Web service configured ✅
- GROQ_API_KEY added securely ✅
- Application deployed live ✅
- Public URL generated ✅
Thank you for following the RohithBuilds AI Agent Course.
See you in the next course! 🤖
Continue Learning with Rohi
You've used your 3 free Rohi questions. Create a free account to continue learning.